
Lerdge 3D Printer


Lerdge 3D Printer Board Notes Archive
Upgrading Your CR 10 S 5 with the Lerdge X 3D Printer Board and Fused3D Sliding Bed Rail
3D printing enthusiasts often seek to elevate the performance and capabilities of their machines. If you own a CR 10 S 5 printer, integrating a Lerdge X 3D Printer board and a Fused3D brand sliding bed rail can breathe new life into your device. Here's a step-by-step guide to help you through the process and ensure a smooth setup with the Keenovo heat bed controller.
1. Introduction to the Lerdge X Board
Before you dive into the setup, it's essential to understand what the Lerdge X board offers. It's an advanced motherboard designed for various 3D printer models, including XYZ (Ultimaker, Makerbot), Delta, CoreXY (Hbot), and CoreXZ.
The Lerdge X board:
Requires a 3.5-inch touchscreen specific to it.
Is not compatible with the older version touch screen of the Lerdge S motherboard.
Supports offline printing by default through TF card or USB. If you would like online printing, it's essential to have an online module.
If you wish to use it with a heated bed, you'd need a heated bed adapter and high-power hot bed module.
2. Preparing for Installation
Ensure you have:
Lerdge X Board (ensure you have the appropriate drivers and 3.5-inch touch screen)
Fused3D Brand sliding bed rail
Keenovo All-Purpose Digital Thermostat Controller Box 30A
A USB or SD card (recommended not to exceed 32G for compatibility)
3. Installing the Lerdge X Board
Disconnect power from your CR 10 S 5.
Remove the original motherboard and disconnect all associated wiring.
Install the Lerdge X board in place of the old motherboard.
Carefully connect all the wires to the appropriate terminals on the Lerdge X board.
4. Setting up the Fused3D Sliding Bed Rail
Detach the original bed rail from the CR 10 S 5.
Install the Fused3D sliding bed rail following the manufacturer's instructions.
Ensure the movement is smooth and there are no obstructions.
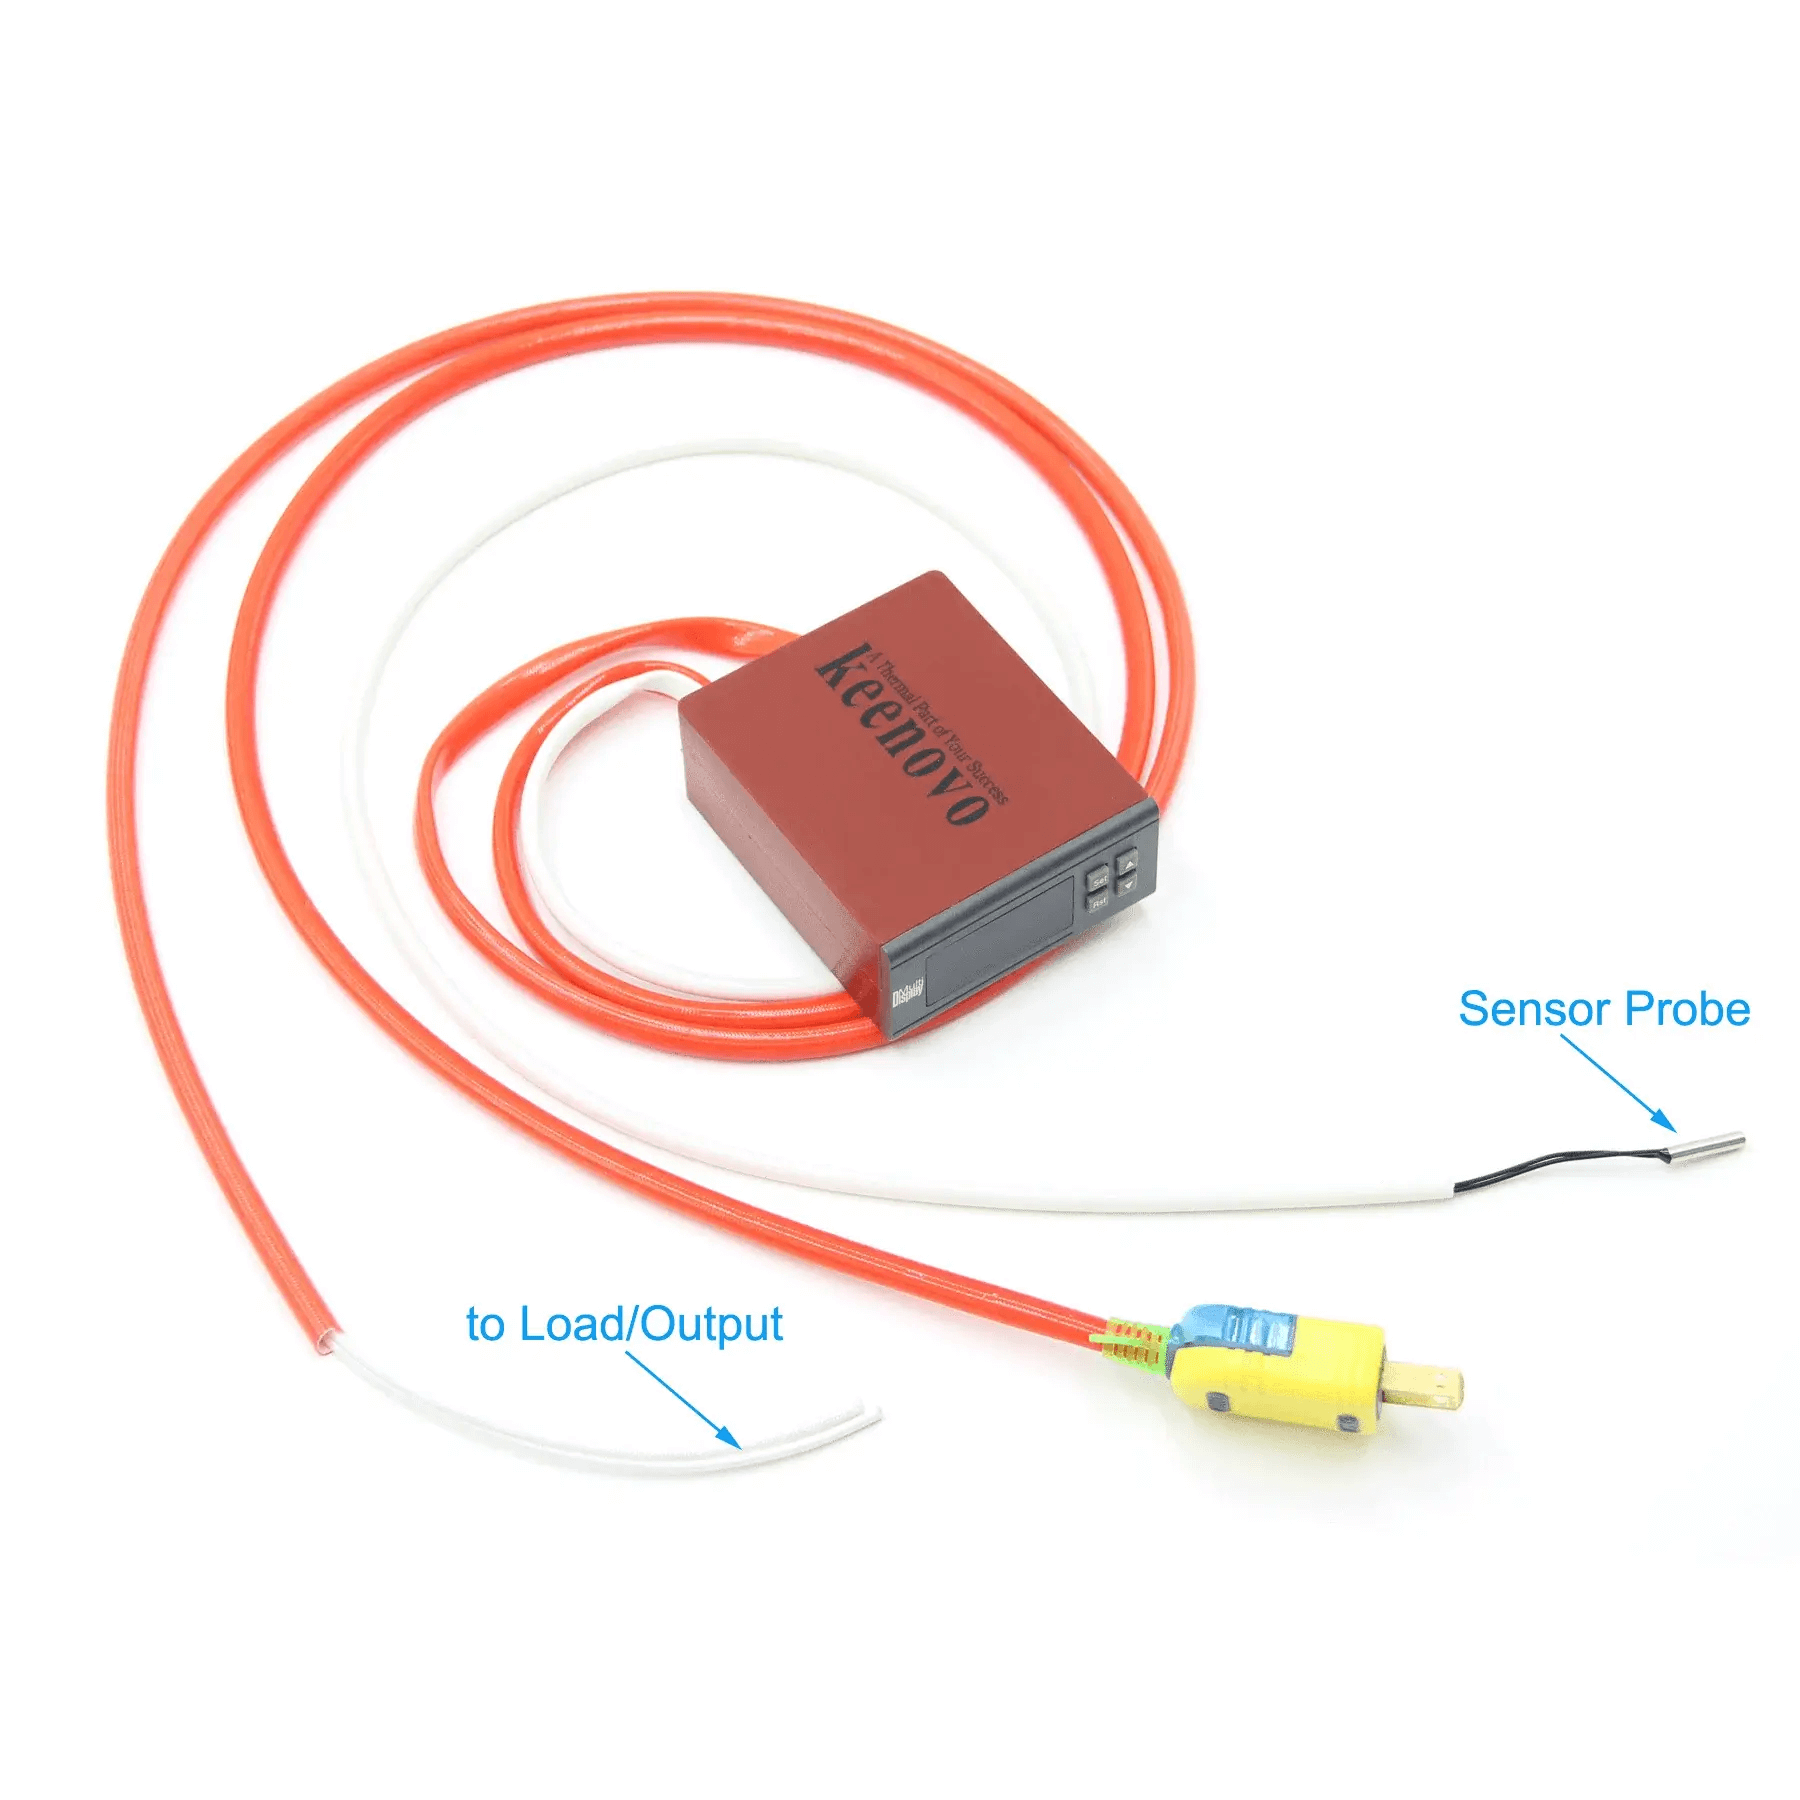
5. Setting up the Keenovo Heat Bed Controller
This device is designed to offer precision temperature control for your heated bed:
Connect the two bare white wires (coming out from the red sleeve) to your load.
Attach the sensor probe to a location on the heated bed. It's recommended to use RTV Thermal Silicone Sealant for better heat transfer around the sensor.
Power on the Keenovo controller. Remember, for the 110V version, the recommended load is up to 1650W.
Please make sure to configure the controller settings according to your requirements. Ensure you've reviewed the Controller Configuration Manual, especially the "Advanced Setting" section.
6. Final Steps
Power on your CR 10 S 5.
Test the new touchscreen interface provided by the Lerdge X board.
Run a test print to ensure everything is functioning correctly. Monitor the heated bed's temperature through the Keenovo controller.
Conclusion
Upgrading your CR 10 S 5 with the Lerdge X board and Fused3D sliding bed rail can significantly enhance its performance and provide a more streamlined user experience. While the process requires patience and precision, the end result is a rejuvenated 3D printing machine ready to handle more sophisticated projects. Please always read manuals and safety instructions carefully to make sure the upgrades are maintained.